


Introduction #
Email forwarding is a handy tool that automatically sends a copy of any emails you receive to another email address. This is especially useful if you have multiple email accounts and want to manage all your incoming emails in one place. For instance, you might forward all your work emails to your personal email account if you check that one more frequently.
Are You Reading the Correct Guide? #
The method for forwarding your domains depends on the services you use. It’s crucial to select the appropriate method, as choosing incorrectly could disrupt the operation of your existing email services. If in doubt, get in touch with us at https://help.hipposerve.co.uk and we will assist you.
We offer 3 different email forwarding methods depending on the service you have with us. Use the widget below to determine which method is best for you.
You should use the third parties email method for forwarding your emails if it is available.
IMPORTANT: You should not use this method if you are using an email with the same domain name.
DNS Setup #
Before you can start using email forwarding through your web hosting you will need to add some DNS records to your DNS for the domain name you will be using. If your domain is held with Hipposerve in most cases this is set up automatically, but you may wish to check your DNS records if you have added multiple products as sometimes records can be overwritten. A full guide to our DNS can be found here.
Find the required DNS Records #
You will need to get the correct DNS records for your domain.
Navigate to your Hippo Panel #
This item is managed within your Hippo Panel. A guide explaining how to access this is available here.Click on the Email Delivery Icon #

- This will open up all the DNS records for your domain name. Don’t worry if some of these say invalid.

- We now need to get the DNS records for the DKIM, SPF and DMARC. Click on each button in turn to retrieve these.
DKIM #
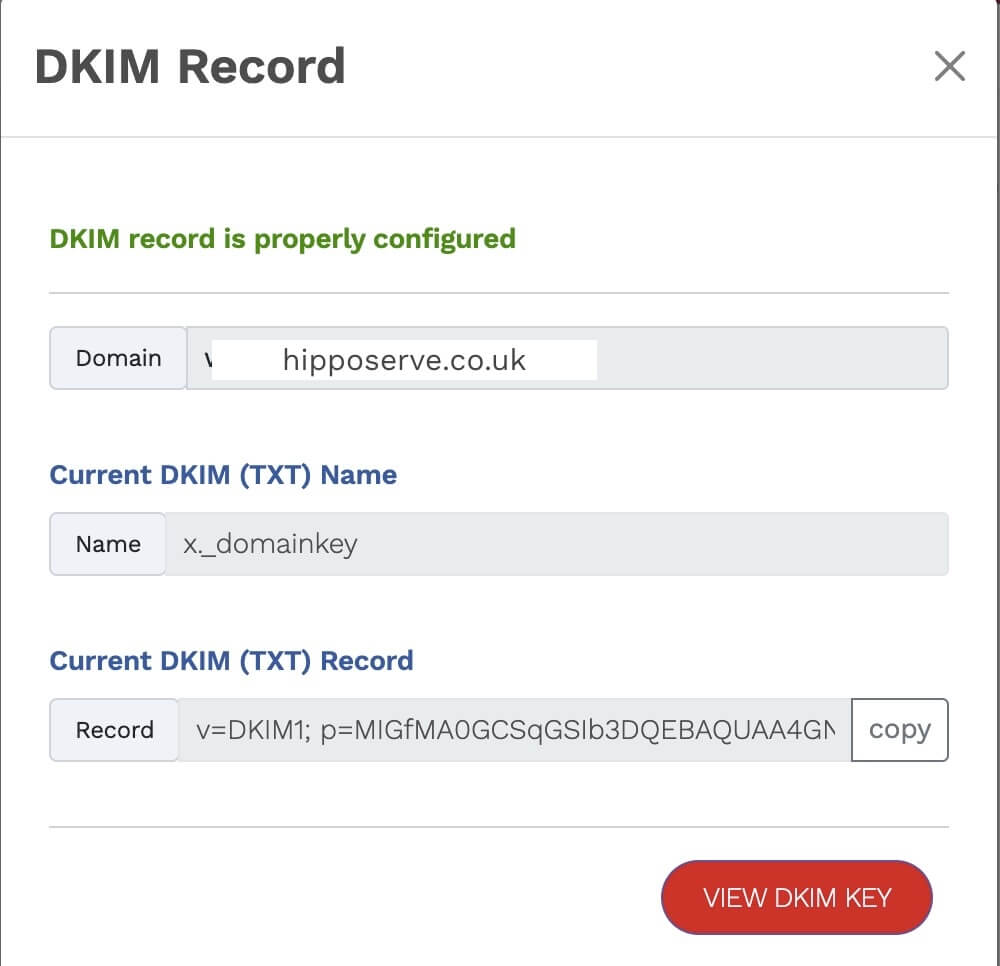
- If this record is not present in your DNS. Create a new TXT record.
- Copy and paste both the Name and the Record into your DNS
SPF #
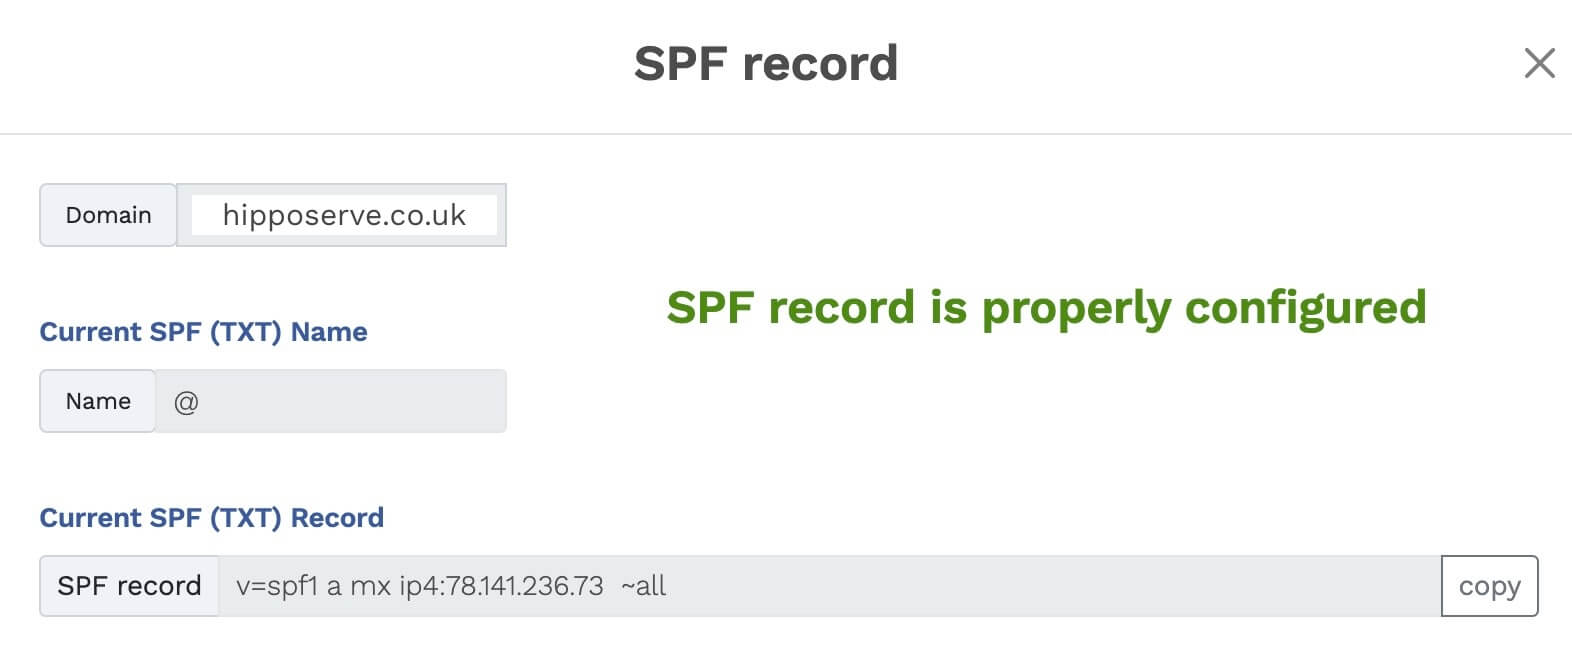
- If this record is not present in your DNS. Create a new TXT record.
- Copy and paste both the Name and the Record into your DNS
- Important: If you already have an SPF record that is different, should remove it before adding this one.
DMARC #
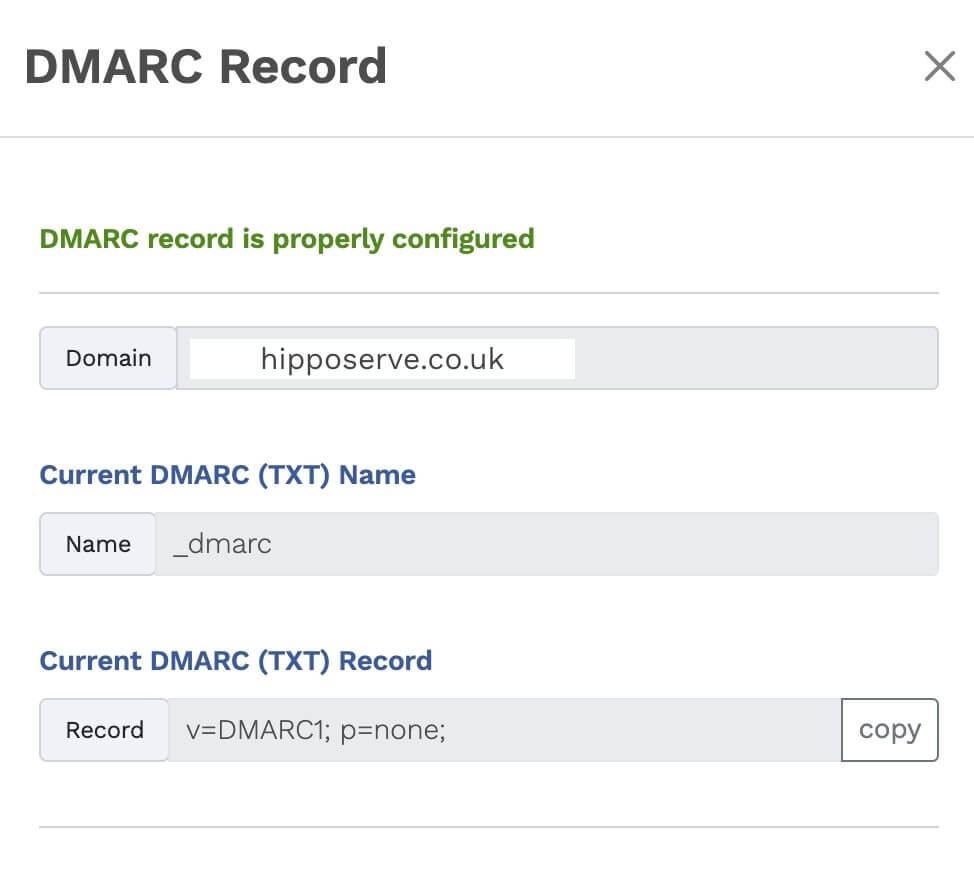
- If this record is not present in your DNS. Create a new TXT record.
- Copy and paste both the Name and the Record into your DNS
- Important: If you already have an DMARC record that is different, should remove it before adding this one.
MX Record #
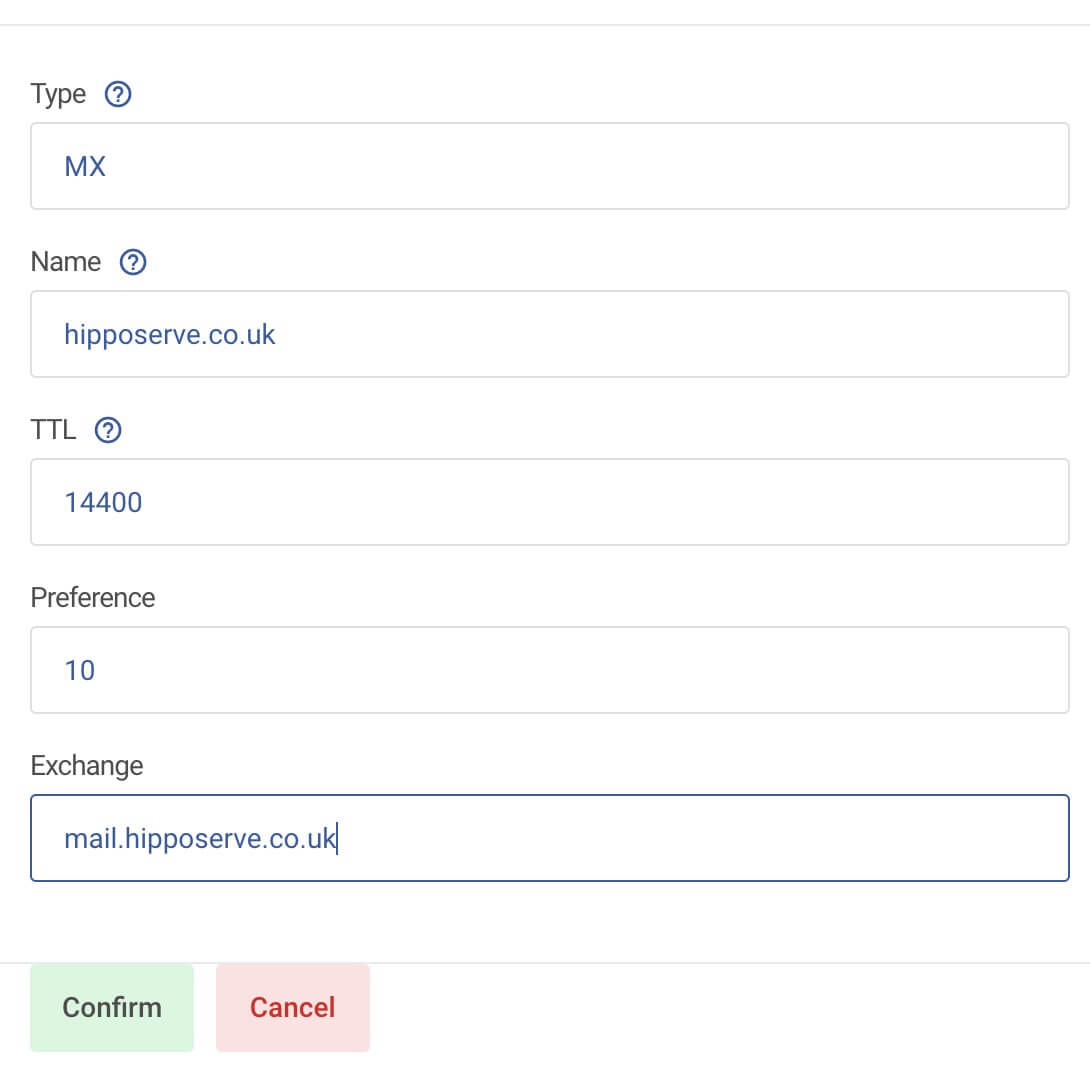
- You also need to add an MX record to your DNS. This is not provided in the email deliverability panel. The example above shows an MX entry for hipposerve.co.uk
- You will need to create a new MX record.
- The name should be yourdomain.co.uk
- The preference should be 10
- The Exchange should be mail.yourdomain.co.uk
DNS Updates #
While DNS updates typically occur within a few minutes, please allow up to 24 hours for changes to fully take effect.
Setting up the Forward #
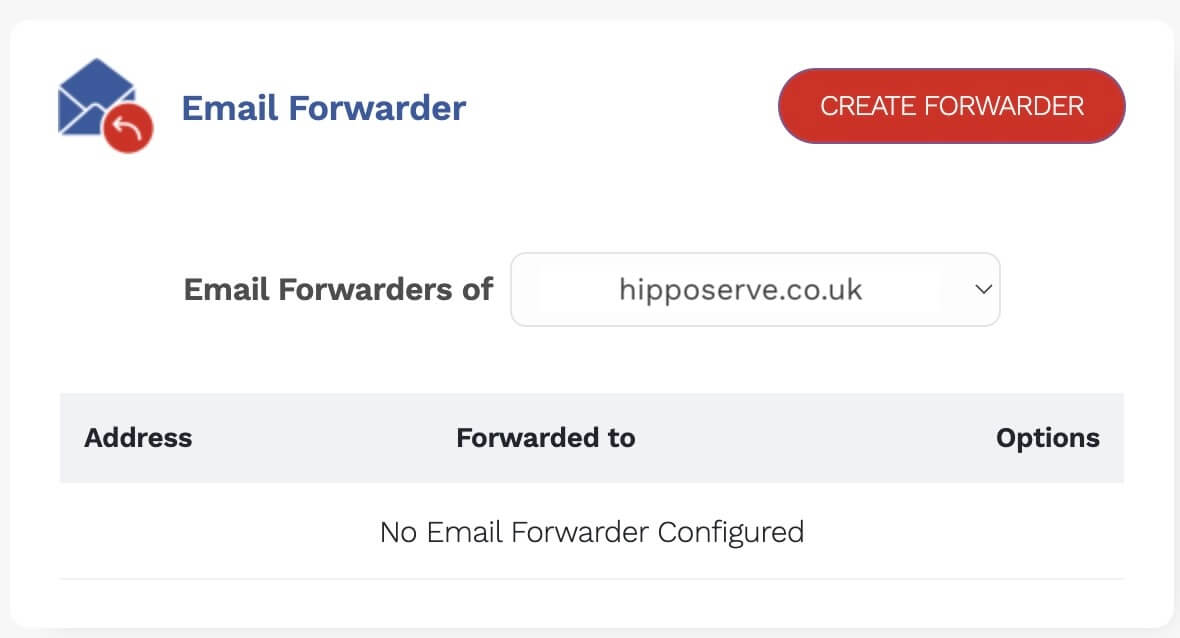
Navigate to your Hippo Panel #
This item is managed within your Hippo Panel. A guide explaining how to access this is available here.Select Email Forwarding #
- Click on the Email forwarders icon.

Create a New Email Forward #
- Click on the “Create Forward” button.
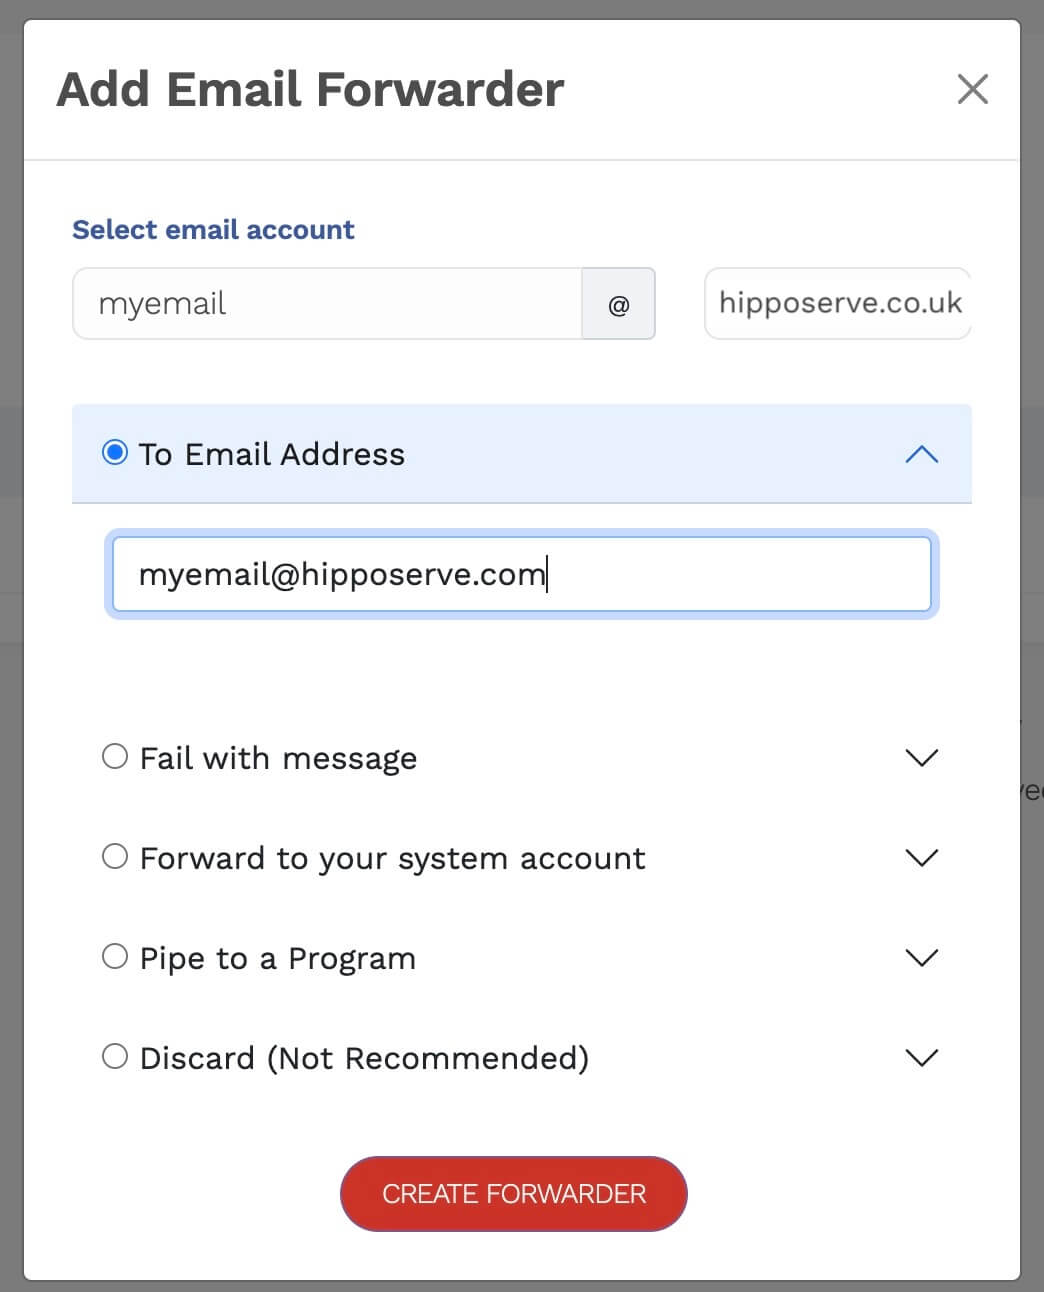
Enter the Forwarding Details
- Choose an email to receive the emails. It doesn’t matter if this address doesn’t actually exist. The system will create a forwarding alias.
- Then add the email address to forward the messages to. This email does have to actually exist.
- Finally click the “Create Forwarder” Button
Check the Forwarder #
- The new email forward should be created.
- You can now set up further email forwarders if required using the same method.


